The intersection of minimalism and geometric precision has revolutionized modern nail art, stripping away excess to reveal the raw beauty of clean lines and intentional negative space. At the heart of this movement lies an unsung hero: striping tape. This deceptively simple tool transforms bare nails into architectural canvases, allowing you to execute razor-sharp angles, parallel lines, and intricate patterns with surgical accuracy. For minimalists who understand that less is infinitely more, mastering striping tape isn’t just a technique—it’s a gateway to expressing sophisticated aesthetic principles at your fingertips.
Whether you’re a seasoned nail artist refining your craft or a discerning enthusiast curating your toolkit, understanding the nuanced differences between striping tape varieties can elevate your geometric designs from amateur to editorial. This comprehensive guide dives deep into the material science, application methodologies, and design considerations that separate exceptional striping tape from mediocre alternatives. We’ll explore everything from adhesive chemistry to color theory integration, ensuring your minimalist geometric visions translate flawlessly from imagination to execution.
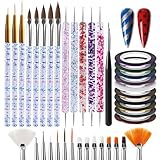
Top 10 Nail Art Striping Tapes for Minimalists
Detailed Product Reviews
1. Nail Art Striping Tape Lines Kit 36 pcs 1mm 2mm 3mm Nail Tape Strips for Design DIY Silver Nails Striping Tape Case,Laser Holographic Nail Rolls Chrome Striping Tape Line

Overview: This comprehensive kit delivers 36 rolls of laser holographic striping tape in three precise widths—1mm, 2mm, and 3mm. With 12 vibrant colors including bronze, green, red, silver, and gold, each roll unfurls an impressive 390 inches of material. The self-adhesive design requires no additional glue, making it ideal for both salon professionals and home enthusiasts working with UV gel, regular polish, or acrylic systems.
What Makes It Stand Out: The holographic chrome effect sets this kit apart, creating dazzling light-reflecting patterns that elevate simple manicures into eye-catching designs. The systematic organization provides every color in all three width options, eliminating the need to purchase separate sizes. The exceptional length per roll ensures months of creative exploration before restocking becomes necessary. These tapes double as French tip guides and nail stencils, maximizing versatility.
Value for Money: At $6.95 for 36 rolls, you’re investing approximately $0.19 per roll—a remarkable price for holographic specialty tape. Comparable individual rolls retail for $1-2 each in beauty supply stores, making this bundle an economical choice for frequent users. The multi-width inclusion adds further value, preventing redundant purchases.
Strengths and Weaknesses: Strengths include stunning holographic finish, generous roll length, three width options per color, and versatile application methods. Weaknesses involve adhesive requiring a topcoat for longevity and potential tangling without a dispenser. Some users may find the tape too delicate for repositioning.
Bottom Line: This kit excels for nail artists prioritizing holographic effects and variety. The extensive length and systematic color-width organization make it a cost-effective, professional-grade choice for creating luminous, multi-dimensional nail art.
2. Artdone 38Pcs Nail Striping Tape Lines Kit With Nail Art Pens Dotting Tools And Liner Brushes For Gel Polish Small Detail Drawing Design Paint
Overview: Artdone’s 38-piece kit combines 10 colored striping tape rolls with 28 essential nail art tools, creating an all-in-one solution for detailed designs. The collection includes dotting tools, liner brushes, and painting brushes specifically engineered for gel polish and acrylic work. Each component works with regular nail polish, offering flexibility for various artistic techniques.
What Makes It Stand Out: This kit’s integrated approach eliminates the need for separate tool purchases, making it uniquely beginner-friendly. The professional-grade brushes feature easy-grip handles and seamless copper ferrules that prevent wobbling during precision work. The self-adhesive tapes require no glue and maintain their luster when sealed with topcoat, streamlining the creative process.
Value for Money: Priced at $5.99 ($0.16 per item), this represents exceptional value for a combined tool-and-tape set. Purchasing brushes and dotting tools separately would cost $15-25, while individual tape rolls average $1 each. The bundled pricing makes professional-quality nail art accessible without compromising on essential tools.
Strengths and Weaknesses: Strengths include comprehensive tool selection, comfortable ergonomic brush design, strong adhesive performance, and versatility across polish types. Weaknesses are the limited 10-color tape selection and potential quality variance in budget-friendly tools. The tape length isn’t specified, which may concern heavy users.
Bottom Line: Perfect for newcomers and intermediate artists, this kit provides everything needed to execute intricate designs. The tool quality surpasses typical starter sets, making it a smart investment for those wanting to explore striping tape art without multiple purchases.
3. 120 Pcs Nail Striping Tapes Nail Art Decoration Tape Lines for DIY Nail Tip with 4 Pcs Nail Tape Dispenser Cases

Overview: This massive collection includes 120 rolls of striping tape across 40 mixed colors, accompanied by four innovative dispenser cases that function like cassette tapes. The self-adhesive tapes work seamlessly with UV gel, acrylic, and traditional nail polish systems. Each dispenser keeps rolls organized and makes locating the tape end effortless, solving a common frustration with bulk tape collections.
What Makes It Stand Out: The quartet of dispenser cases revolutionizes storage and accessibility, preventing the tangled mess that often plagues large tape assortments. With 40 distinct colors, this kit offers one of the most extensive palettes available, enabling complex multi-color designs without repetition. The systematic packaging keeps each roll individually wrapped, maintaining cleanliness and organization.
Value for Money: At $9.99 for 120 rolls, the per-unit cost drops to approximately $0.08—among the lowest in the category. Professional salons typically pay $0.50-$1 per roll, making this an outstanding bulk purchase. The included dispensers, which would cost $3-5 each separately, add significant practical value.
Strengths and Weaknesses: Strengths include unparalleled color variety, innovative dispenser system, exceptional bulk pricing, and professional-grade suitability. Weaknesses involve substantial storage requirements and potential overwhelm for casual users. Some colors may receive minimal use, and the dispensers add plastic components some eco-conscious buyers might avoid.
Bottom Line: Ideal for professional nail technicians and dedicated hobbyists, this comprehensive system eliminates color limitations and organizational headaches. The dispenser innovation justifies the investment, making it the ultimate high-volume solution for serious nail art practitioners.
4. Artdone Nail Striping Tape Lines Kit With Nail Art Pens Dotting Tools And Liner Brushes For Gel Polish Small Detail Drawing Design Paint

Overview: Artdone presents a streamlined 15-piece kit featuring 10 colored striping tape rolls paired with five professional liner and painting brushes. This focused set prioritizes quality over quantity, equipping artists with essential tools for precision gel polish and acrylic detailing. The self-adhesive tapes work as nail stencils and French tip guides, while the ergonomic brushes feature secure copper ferrules.
What Makes It Stand Out: This kit’s curated approach targets serious artists who need reliable brushes without excess tools. The brush quality exceeds typical kit standards, with easy-grip handles and double-crimped ferrules that eliminate wobbling during intricate line work. The compact selection prevents decision fatigue while maintaining creative versatility for both home and salon environments.
Value for Money: At $6.29 ($0.42 per item), the higher per-unit cost reflects the premium brush inclusion. Five professional detail brushes typically retail for $8-12 alone, making the tape essentially complimentary. This represents strategic value for brush-focused users rather than tape collectors.
Strengths and Weaknesses: Strengths include superior brush construction, focused tool selection, clean adhesive application, and multi-use tape functionality. Weaknesses include limited tape colors (10 versus competitors’ 36-120) and fewer tools than the larger Artdone kit. Tape length remains unspecified, potentially impacting long-term value.
Bottom Line: A smart choice for experienced artists seeking quality brushes with supplemental tape options. The professional-grade tools justify the moderate price premium, making it perfect for those who prioritize precision instrumentation over extensive color libraries.
5. Nail Art Striping Tape Lines Kit 36 pcs 1mm 2mm 3mm Nail Tape Strips for Design DIY Silver Nails Striping Tape (White)

Overview: This 36-roll kit mirrors its holographic counterpart but delivers a glitter matte finish in 12 curated colors. Three widths—1mm, 2mm, and 3mm—are provided for each shade, including bronze, green, red, silver, and gold. The self-adhesive strips apply cleanly without glue and function as both design elements and French manicure guides, compatible with UV gel and traditional polish systems.
What Makes It Stand Out: The glitter matte texture offers a sophisticated alternative to glossy or holographic finishes, providing subtle sparkle without overwhelming shine. Each color appears in all three width variations, enabling cohesive multi-line designs. The environmentally friendly plastic and paper construction appeals to eco-conscious creators, while the bright pigmentation maintains visibility under various lighting conditions.
Value for Money: Priced at $6.95, this kit matches the holographic version’s cost-effectiveness at approximately $0.19 per roll. The specialized matte finish typically commands premium pricing in individual sales, making this bundle economically attractive for artists seeking variety beyond standard metallic options.
Strengths and Weaknesses: Strengths include unique glitter matte finish, systematic width organization, versatile application methods, and eco-friendly materials. Weaknesses involve potential confusion over length specifications (39 versus 390 inches) and the matte texture’s reduced versatility compared to holographic options. The adhesive may require additional sealing for extended wear.
Bottom Line: Choose this kit if you prefer understated elegance over high-shine effects. The glitter matte finish distinguishes it from typical metallic tapes, making it ideal for sophisticated, modern nail designs that demand texture variation without excessive brilliance.
6. 32 Colors Nail Striping Tape for Nail Art 1mm Self Adhesive Nail Striping Tape Line Sticker Pinstripe Tape Decoration Sticker Pin Striping Tape DIY Nail Tools for Women Girls Manicure Decor (66 Foot)

Overview: This comprehensive nail striping tape collection delivers 32 vibrant colors in a convenient self-adhesive format. Each roll measures 1mm wide and 20 meters long, providing ample material for countless manicure designs. The set caters to both beginners and experienced nail artists seeking professional-looking line work without the mess of liquid stripers.
What Makes It Stand Out: The sheer color variety at this price point is exceptional. With 32 distinct shades ranging from neons to metallics, you can create intricate patterns, geometric designs, and delicate details that would be nearly impossible with traditional polish. The self-adhesive backing eliminates drying time and allows for immediate placement corrections.
Value for Money: At under $6 for 640 total meters of tape, this represents remarkable value. Individual bottles of striping polish cost $3-5 each and dry out quickly. Competitors offer 6-12 colors for similar prices, making this 32-color collection a budget-conscious choice for expanding your nail art repertoire without breaking the bank.
Strengths and Weaknesses: Strengths: Unbeatable color selection; generous 20m length per roll; strong self-adhesive holds firm; versatile for multi-surface use; compact storage design. Weaknesses: 1mm width limits design options; may require topcoat sealing for longevity; thin material can stretch if mishandled; colors may vary slightly from photos.
Bottom Line: Perfect for DIY enthusiasts who want maximum creative freedom without investing in expensive equipment. The extensive color palette and user-friendly application make this an essential starter kit for anyone serious about nail art.
7. Nail Art Striping Tape Lines Kit 36 pcs 1mm 2mm 3mm Nail Tape Strips for Design DIY Silver Nails Striping Tape (Silver)

Overview: This specialized kit focuses on metallic chrome finishes across three different widths, offering 36 individual tapes in 12 colors. Each roll provides 39 inches of material with options in 1mm, 2mm, and 3mm sizes, allowing for varied design complexity. The metallic sheen creates a striking, reflective finish that elevates simple manicures into salon-quality art.
What Makes It Stand Out: Unlike single-width sets, this collection’s three-size approach enables layered designs and varied line weights in a single manicure. The metallic foil construction catches light dramatically, producing a holographic effect that standard colored tapes cannot replicate. This makes it ideal for accent nails and statement pieces.
Value for Money: While slightly pricier than basic sets, the multi-width versatility justifies the $6.95 cost. Purchasing separate width variations would easily exceed $15. The metallic finish also mimics expensive chrome powders without requiring special equipment or curing time, delivering professional results at a fraction of salon prices.
Strengths and Weaknesses: Strengths: Three width options; brilliant metallic finish; no glue needed; works with UV gel and acrylic systems; excellent for tumblers and crafts. Weaknesses: Shorter 39-inch length per roll; adhesive may need supplemental sealer; limited to metallic shades; foil can tear if overstretched; color consistency varies between batches.
Bottom Line: An excellent choice for intermediate artists wanting dimensional variety and metallic flair. The width options and foil finish make this worth the modest premium over basic tape sets.
8. 20 Pcs Glitter Gold Silver Nail Art Striping Tape Line Shiny Nail Art Decoration Strips Self Adhesive Decals Strips DIY Nail 3D Tips Manicure Tools Nail Tape Rolls (1mm)

Overview: This minimalist set delivers exactly what it promises: 20 rolls of glitter-infused gold and silver striping tape. Each 1mm roll contains 20 meters of self-adhesive material, split evenly between the two metallic shades. The glitter particles embedded in the tape create a sparkling, textured finish that adds dimension to any manicure without additional products.
What Makes It Stand Out: The glitter integration sets this apart from standard metallic tapes. While most competitors offer flat colors or simple foil finishes, the subtle sparkle catches light from multiple angles, creating depth. The dual-color approach focuses on the two most versatile metallic shades, eliminating decision fatigue for users who primarily want classic glamour.
Value for Money: At $5.95 for 400 total meters, the per-meter cost is competitive with non-glitter alternatives. Gold and silver striping polishes typically cost $4-7 each and require steady hands. This tape delivers consistent results instantly, making it cost-effective for frequent use. The specialized glitter finish replicates expensive glitter topcoats without the mess.
Strengths and Weaknesses: Strengths: Glitter finish adds unique texture; generous 20m length; strong adhesion; works with all nail systems; perfect for special occasions. Weaknesses: Only two colors limits creativity; glitter may dull if not topcoated; 1mm width only; removal can leave residue; packaging lacks variety.
Bottom Line: Ideal for those who prioritize elegant metallic accents over color variety. The glitter finish makes this perfect for weddings, holidays, and everyday glamour without the premium price tag.
9. MYUBWTF 60 Colors Nail Striping Tape Line 2 Pieces Nail Tape Dispensers Free Tape Roller Dispenser Striping Tape Line Nail Art Decoration Stickers Nail Art Decoration Sticker DIY Nail Tip

Overview: This ambitious set attempts to be the ultimate all-in-one solution by combining 60 colorful striping tapes with two dedicated dispensers. The collection includes 30 distinct colors, presumably with duplicate rolls, spanning the full spectrum from neutrals to brights. Each 1mm roll contains 20 meters of self-adhesive tape, while the included dispensers promise easier handling and storage.
What Makes It Stand Out: The complimentary dispensers are a game-changer for organization. Unlike loose rolls that tangle and get lost, the dispenser system keeps tapes accessible and prevents unwinding. The 60-roll quantity ensures you won’t run out of popular colors quickly, making this suitable for heavy users and small salon operations.
Value for Money: At $5.99, including two dispensers, this is arguably the best value proposition on the market. Comparable dispenser units alone sell for $3-5 each. You’re essentially getting 60 rolls of tape for free when factoring in the accessory value. For frequent nail artists, the time saved on organization alone justifies the purchase.
Strengths and Weaknesses: Strengths: Includes dispensers; massive color selection; excellent price-to-quantity ratio; individually packaged; multi-system compatibility. Weaknesses: Some colors may be duplicates; dispenser quality is basic; 1mm width only; adhesive strength varies by color; storage box not included.
Bottom Line: The dispensers make this a must-have for serious hobbyists and professionals. Unbeatable value for the quantity and accessories provided, despite some minor quality inconsistencies.
10. Kifmurase 15Pcs Gold Silver Lines Nail Art Stickers Decals 3D Golden French Manicure Strips Self-Adhesive Nails Art Decorations Supplies Geometric Waved Stripe Tape Manicure Sliders for Women DIY

Overview: This premium set focuses on quality over quantity with 15 rolls of 3D self-adhesive nail stickers in five sophisticated colors: gold, rose gold, silver, black, and white. Unlike traditional flat tapes, these feature a textured, three-dimensional design that creates raised patterns on the nail surface. The French manicure emphasis suggests a focus on elegant, timeless styles rather than flashy art.
What Makes It Stand Out: The 3D texture creates a truly unique manicure experience. While standard tapes lie flat, these slightly raised strips catch light and shadow, mimicking professional gel extensions or embossed designs. The safety-first formulation claims suitability for pregnant women and children, indicating higher material standards than typical craft-grade tapes.
Value for Money: At $6.99 for 15 rolls, this appears expensive compared to bulk sets. However, the specialized 3D technology and premium color curation target a different market. Comparable textured nail products like gel strips cost $10-15 per set. For those seeking sophisticated, minimalist designs, the per-use value exceeds raw roll length.
Strengths and Weaknesses: Strengths: Unique 3D texture; premium color selection; safe for sensitive users; easy removal; professional French manicure results; excellent gift packaging. Weaknesses: Limited color variety; higher price per roll; may not suit bold art styles; 3D texture can catch on fabric; shorter length not specified.
Bottom Line: Perfect for mature users prioritizing elegant, wearable art over experimental colors. The 3D effect and safety credentials justify the premium for those wanting sophisticated, salon-quality French manicures at home.
Why Striping Tape is Essential for Minimalist Geometric Nail Art
Minimalist geometric nail designs thrive on mathematical precision—every line must be perfectly straight, every angle exact. Freehand painting, even with the steadiest hand, introduces human variability that contradicts minimalism’s core principle of intentional perfection. Striping tape acts as both guide and design element, creating crisp boundaries that polish cannot cross and leaving behind metallic or contrasting accents that become part of the final composition. Unlike stencils or stickers, striping tape offers infinite configurability, letting you build custom patterns that reflect your personal minimalist philosophy while maintaining the razor-sharp edges that define the aesthetic.
Understanding Different Types of Nail Art Striping Tape
Not all striping tapes are created equal, and understanding their fundamental differences prevents costly experimentation and disappointing results. The market offers several distinct categories, each engineered for specific applications and skill levels.
Vinyl vs. Paper-Based Tapes
Vinyl striping tapes dominate professional kits for good reason—they possess a slight stretch that allows them to conform to the nail’s natural C-curve without lifting at the edges. Their plastic composition repels polish, preventing seepage underneath and ensuring clean removal. Paper-based tapes, while often more affordable, absorb polish and can tear during application, leaving fibrous residue that ruins crisp lines. For geometric minimalism where precision is non-negotiable, vinyl’s superior performance justifies its premium status.
Pre-Cut vs. Roll Tape
Pre-cut striping tape segments promise convenience but sacrifice creative freedom. These fixed-length pieces work for standard nail sizes but limit your ability to create continuous lines across multiple nails or execute ambitious spanning designs. Roll tape, conversely, provides unlimited length and empowers you to cut pieces precisely to your specifications. Minimalist designs often require unconventional placements that defy standard measurements—roll tape ensures you’re never constrained by predetermined dimensions.
Key Features to Look for in Quality Striping Tape
Discerning quality in striping tape requires looking beyond packaging promises to evaluate tangible performance characteristics. The difference between tape that elevates your art and tape that frustrates your process lies in several critical attributes.
Transparency and Opacity Levels
Clear striping tape serves as a temporary guide that gets removed after polish application, while opaque tapes—particularly metallics—remain as permanent design elements. For minimalist geometric work, you need both types in your arsenal. Clear tape must be perfectly transparent to allow precise placement visibility, while opaque tapes should offer complete opacity in a single layer, preventing base colors from muddying their impact.
Temperature Resistance
Your body heat and curing lamps expose striping tape to temperature fluctuations that can compromise adhesive performance. Quality tapes maintain consistent tackiness between 65-85°F and resist becoming brittle under LED/UV lamps. Inferior tapes may release mid-cure, causing polish bleed, or leave gummy adhesive residue that requires harsh acetone removal—damaging both your design and natural nails.
Width Variations and Their Design Applications
Width selection directly impacts the visual weight of your geometric patterns. Minimalist design relies heavily on proportional relationships, making width variety crucial for creating hierarchical visual interest.
Ultra-Thin Lines (0.5mm and below)
These whisper-thin strips create delicate grid patterns and subtle divisions without overwhelming negative space. They’re ideal for adding technical precision to nude or sheer bases, creating the illusion of hand-drawn architectural blueprints. However, their fragility demands steady application and sharp cutting tools—dull scissors will compress rather than cut, creating jagged edges.
Standard Stripes (1-2mm)
The workhorse width for most geometric designs, these strips provide visible definition while maintaining minimalist restraint. They excel at creating bold chevrons, parallel divisions, and triangular compositions. This width range offers the best balance between impact and subtlety, making it the foundation of any minimalist tape collection.
Bold Accents (3mm and above)
Wide strips function as color-blocking tools rather than mere outlines. In minimalist aesthetics, they create strong geometric anchors—a single 4mm metallic stripe across a bare nail makes a powerful statement. These widths require exceptional adhesive quality, as their larger surface area amplifies any lifting or bubbling issues.
Material Composition: What Makes Tape Durable
The physical makeup of striping tape determines its durability during application and wear. Professional-grade tapes utilize multi-layer construction: a polyester film base provides tensile strength, while specialized coatings manage adhesion and release properties. This engineering prevents stretching during application—a common issue with single-layer tapes that distorts geometric patterns. For minimalist designs where parallel lines must remain perfectly equidistant, dimensional stability is paramount. The tape’s thickness also matters; excessively thick tapes create obvious ridges that disrupt the smooth, planar aesthetic minimalism demands.
Adhesive Quality: The Balance Between Stick and Release
Adhesive chemistry represents the most critical yet overlooked aspect of striping tape performance. The ideal adhesive forms an instant bond with the nail surface, preventing polish seepage, yet releases cleanly without pulling up base layers or leaving residue. This balance requires pressure-sensitive adhesives specifically formulated for cosmetic application. Avoid industrial or craft tapes, which use aggressive adhesives designed for permanent bonding—these can damage the nail plate and cause painful removal experiences.
Color Palette Considerations for Minimalist Designs
Minimalist nail art traditionally operates within restrained color families, and your striping tape collection should reflect this discipline. While rainbow assortments seem appealing, they often include hues that clash with minimalist principles. Instead, curate your tape colors intentionally.
Monochromatic Schemes
Black, white, and varying grays create the most versatile minimalist palette. Black striping tape on a nude base produces stark, graphic impact, while white tape over dark polish creates negative space illusions. Gray tones offer subtle gradation possibilities, allowing you to create depth without introducing chromatic complexity.
Neutral Tones for Minimalism
Metallic tapes in gold, silver, and rose gold function as neutrals in minimalist design, adding luminosity without color temperature conflicts. Matte black and white tapes provide sophisticated alternatives to glossy finishes, creating architectural shadows rather than reflective highlights. When selecting nude-toned tapes, match them to various skin undertones—cool, warm, and olive—to ensure they integrate seamlessly into clean designs.
Metallic vs. Matte Finishes: Impact on Aesthetics
Finish selection fundamentally alters how light interacts with your geometric designs. Metallic striping tapes act as light-catchers, creating dynamic patterns that shift with movement. This quality can either enhance or undermine minimalist intentions—use them strategically as singular focal points rather than comprehensive patterns. Matte finishes absorb light, emphasizing line quality and geometric purity. They recede visually, making them perfect for subtle grid work that complements rather than competes with negative space. Some advanced tapes offer dual finishes—metallic on one side, matte on the reverse—providing flexibility within a single roll.
Flexibility and Conformability to Nail Curves
A tape’s ability to curve without creasing determines its suitability for modern nail shapes. Almond, oval, and stiletto nails require tape that follows their longitudinal arch without lifting at the edges or creating buckles. High-quality vinyl tapes achieve this through calibrated thickness and inherent material memory—they return to their original shape after stretching, maintaining line integrity. Test flexibility by wrapping a tape piece around a pen; if it lies smooth without puckering, it will conform to your nail’s C-curve. Rigid tapes force you to work only on flat nail beds, severely limiting your design potential.
Ease of Application: Tools and Techniques
Your application technique is only as good as your supporting tools. Minimalist geometric designs demand precision that fingers alone cannot achieve.
Essential Application Tools
Invest in stainless steel tweezers with fine, angled tips for handling tape segments—fingers transfer oils that compromise adhesion. A silicone-tipped cuticle pusher helps press tape edges without scratching. For cutting, use sharp, non-serrated scissors or a precision craft knife on a glass mat. A lint roller kept nearby quickly cleans tweezers of adhesive buildup, ensuring consistent grip.
Step-by-Step Application Process
Begin with completely dry base polish—tackiness causes tape to adhere permanently. Cut tape slightly longer than needed, anchor one end with tweezers, and slowly lay the strip while pressing gently with the silicone tool. Work from center to edges to expel air bubbles. For geometric patterns, apply all tape pieces before adding accent polish to ensure color consistency. Remove tape while topcoat is still tacky, pulling at a 45-degree angle away from the design to prevent edge lifting.
Longevity and Wear Resistance Factors
A minimalist geometric design loses impact when tape edges begin lifting after 48 hours. Several factors influence longevity: adhesive quality, topcoat compatibility, and nail preparation. Always wrap tape ends slightly over the nail edge—this mechanical anchor prevents water intrusion that causes lifting. Use flexible, rubberized topcoats that move with the nail rather than rigid, quick-dry formulas that crack at tape edges. Proper nail prep matters; dehydrate the nail plate with alcohol before base coat to create an oil-free surface that maximizes tape adhesion.
Removal Process: Protecting Your Natural Nails
Aggressive tape removal can strip layers of natural nail, causing thinning and breakage. The correct technique preserves both your design’s integrity and nail health. Soak a cotton pad in acetone-free remover and hold it over the tape for 10-15 seconds—this dissolves the adhesive bond without attacking the tape material. Gently lift one end with tweezers and slowly peel back, never pulling perpendicular to the nail. If resistance occurs, apply more remover rather than forcing removal. For tapes designed to remain as design elements, file the free edge rather than peeling to prevent base coat disruption.
Storage and Maintenance Best Practices
Striping tape’s performance degrades with improper storage. Heat and humidity activate adhesive prematurely, causing tapes to stick to themselves or lose tackiness. Store rolls in a cool, dark environment—ideally below 75°F—with silica gel packets to control moisture. Original packaging protects from dust, but if transferring to organizers, choose airtight containers. Keep tapes horizontal to prevent edge curling, and never stack heavy objects on top that could compress rolls. Clear tapes are particularly vulnerable to UV exposure, which yellows them over time and reduces transparency.
Common Mistakes to Avoid When Using Striping Tape
Even experienced artists fall prey to pitfalls that compromise geometric precision. Stretching tape during application is the most frequent error—this creates lines that narrow at the ends and distorts measurements. Always cut extra length and trim after placement. Applying tape to partially cured polish seems time-efficient but results in permanent bonding; wait the full manufacturer-recommended dry time. Another critical mistake is using the same tape piece multiple times—adhesive transfer diminishes with each application, increasing seepage risk. Finally, pressing too firmly with metal tools can cut through tape, creating invisible breaks that allow polish to bleed.
Advanced Techniques for Professional-Looking Results
Once you’ve mastered fundamentals, advanced methods distinguish hobbyist work from editorial-quality designs. These techniques leverage striping tape’s unique properties to create effects impossible through other methods.
Negative Space Mastery
Create complex negative space patterns by layering tape in intersecting geometries, painting over the entire nail, then removing tape in stages. Apply base coat and let dry completely. Lay your primary geometric pattern, paint with a sheer tint, remove tape while wet, then apply a secondary tape pattern over the cured tint. Paint with a contrasting cream, remove all tape, and the resulting design reveals multiple layers of negative space with crisp interlocking shapes.
Layering for Depth
Minimalism doesn’t preclude dimension. Apply thin metallic tape lines directly to the natural nail, cover with a sheer nude polish, then add a second layer of tape in a slightly different pattern. Top with a clear, glossy gel and cure. The tape beneath the translucent polish creates a phantom pattern that shifts with viewing angle, adding sophisticated depth without visual clutter.
Integrating Striping Tape with Minimalist Color Theory
Minimalist color theory prioritizes value relationships over hue complexity. When selecting striping tape colors, consider their tonal value relative to your base polish. A light gray tape on white polish creates subtle texture, while the same tape on black creates high contrast. Understanding these relationships allows you to build monochromatic designs with visual interest derived from line weight and spacing rather than color variety. Limit yourself to three values—light, medium, and dark—to maintain minimalist discipline while creating compelling compositions.
Budget vs. Premium: Understanding Price Points
Price often correlates with quality, but understanding what you’re paying for helps make informed decisions. Budget tapes typically use single-layer construction with basic adhesives, suitable for occasional use but frustrating for complex designs. Premium tapes justify their cost through consistent width tolerance—critical for parallel line work—and adhesives formulated for clean release. They also offer specialized finishes and widths unavailable in economy sets. For dedicated minimalist artists, investing in premium clear tape and three essential metallic shades (gold, silver, black) provides better value than a large, low-quality assortment. Consider cost per use rather than upfront price—a $15 roll that performs flawlessly for 50 manicures costs less than a $5 roll that wastes polish and time through failed applications.
Frequently Asked Questions
How do I prevent striping tape from lifting at the edges? Edge lifting stems from three main issues: inadequate nail prep, tape that’s too narrow for the curve, or incompatible topcoat. Always dehydrate nails with alcohol before base coat, choose tape width appropriate for your nail’s arch, and use a flexible, rubberized topcoat. Wrapping tape ends slightly over the free edge creates a mechanical seal that prevents water intrusion and lifting.
Can striping tape be reused after removing it from a manicure? Never reuse striping tape. The adhesive transfers to the nail surface during application, significantly reducing tackiness for subsequent uses. Reused tape allows polish seepage, creates fuzzy edges, and often stretches unevenly. Professional results require fresh tape for each application—a small investment that ensures crisp, reliable performance.
What’s the difference between striping tape and nail vinyls? Striping tape comes in continuous rolls of varying widths, offering unlimited length and custom cut options. Nail vinyls are pre-cut shapes and lines with backing paper, designed for single-use convenience. For minimalist geometric designs requiring precise, continuous lines across multiple nails, striping tape provides superior flexibility and control.
How long should I wait before applying tape to wet polish? Wait for base polish to dry completely—typically 30-60 minutes for regular polish, or full cure for gel. A simple test: gently press a clean fingertip to the nail; if any impression remains, it’s too early. Applying tape to even slightly tacky polish creates permanent bonding, making removal impossible without damaging the base layer.
Why does my tape leave sticky residue on my nails? Residue indicates low-quality adhesive not formulated for cosmetic use. Industrial adhesives break down under topcoat solvents, leaving gummy deposits. Switch to professional nail art tape with pressure-sensitive adhesives. If residue occurs, remove it with a drop of cuticle oil on a cotton pad rather than acetone, which can drive the adhesive deeper into the nail plate.
Can I apply striping tape directly to natural nails without polish? Yes, but with precautions. The natural nail’s oils prevent strong adhesion, so thoroughly cleanse with alcohol first. Apply a base coat anyway—this creates a uniform surface and protects nails from potential adhesive chemicals. Tape applied directly to bare nails often lifts within hours as natural flexing breaks the adhesive bond.
How do I cut perfectly straight tape segments without fraying? Use sharp, non-serrated scissors or a precision craft knife on a glass cutting mat. Cut with a single, decisive motion—sawing motions create jagged edges. For ultra-precise lengths, place tape on a silicone mat, measure with a ruler, and score with a knife. Always cut tape slightly longer than needed and trim excess after application for clean ends.
What’s the best way to store striping tape long-term? Store rolls horizontally in an airtight container with silica gel packets, away from heat and sunlight. Ideal temperature is 60-75°F. Avoid storing in bathrooms where humidity fluctuates dramatically. For extended storage (6+ months), seal rolls in vacuum bags to prevent adhesive degradation. Never refrigerate—condensation activates adhesive prematurely.
How do I create perfect parallel lines with consistent spacing? Use a spacing guide or create a template from cardstock. Apply the first line, then place a second piece of tape alongside it as a spacer. Remove the spacer and apply your permanent tape in its place. For multiple parallels, work from the center outward to ensure symmetrical placement. Digital calipers can measure exact spacing for mathematically precise patterns.
Can striping tape be used with gel polish systems? Absolutely, and gel’s self-leveling properties can enhance striping tape results. Apply tape to fully cured base gel, wipe the tacky layer with alcohol to ensure clean adhesion, then apply color gel. Cure with tape in place, then remove immediately after curing while the gel is still warm—this prevents shrinkage from pulling up tape edges. Finish with a gel topcoat, capping the free edge to seal tape ends permanently.