If you’ve been scrolling through nail art inspiration lately, you’ve likely noticed the sophisticated almond shape dominating feeds everywhere. There’s something undeniably elegant about that tapered silhouette—it elongates fingers, flatters every hand shape, and serves as the perfect canvas for everything from minimalist nudes to intricate nail art. But achieving that flawless almond shape at home or in the salon requires more than just a steady hand; it demands the right enhancement product and technique. Enter polygel combined with dual forms: a revolutionary pairing that’s transformed how nail technicians and DIY enthusiasts approach sculpting.
Unlike traditional acrylics that can be unforgiving or hard gels that require masterful brush control, polygel offers a unique putty-like consistency that gives you time to perfect your shape before curing. When paired with dual forms, this hybrid formula becomes a powerhouse for creating symmetrical, structurally sound almond nails with minimal filing. Whether you’re building your professional kit or upgrading your at-home setup, understanding what makes certain polygel tubes superior for this specific application will save you countless hours of frustration and wasted product.
Top 10 Polygel Tubes for Sculpting Almond Nails
Detailed Product Reviews
1. Flat Polygel Nail Forms Almond Shape,GlimightyX Straight Built-in Apex Dual Forms Molds Reusable,Pre-designed French Guildelines Polygel Tips for Nail Extension Salon Home DIY

Overview: The GlimightyX Flat Polygel Nail Forms address a common frustration for those with flat nail beds. These almond-shaped dual forms feature a pioneering design that rejects the traditional deep curve, offering a thinner, more natural profile that mirrors actual nail contours.
What Makes It Stand Out: The pre-designed French guidelines with smile line guides and horizontal length markers eliminate guesswork, ensuring symmetrical, professional-looking French tips. With 14 inclusive sizes ranging from 16.2mm to 6.2mm, these forms accommodate everything from extra-wide thumbs to petite pinkies. The soft gel material provides flexibility without cracking, bending smoothly to prevent creasing.
Value for Money: At $7.99 for a reusable set, these forms deliver exceptional value. Traditional ABS forms often require excessive filing and product waste, but these thin, efficient designs minimize material usage while maximizing comfort and natural appearance.
Strengths and Weaknesses: Strengths include the truly flat design that prevents lifting, comprehensive sizing, French guidelines for easy application, and durable soft gel construction. The reusable nature adds sustainability. Weaknesses include a potential learning curve for those accustomed to traditional curved forms, and they may not suit clients with highly curved natural nails.
Bottom Line: Perfect for nail technicians and DIY enthusiasts with flat nail beds, these forms revolutionize the extension process. The French guidelines and inclusive sizing make them a worthwhile investment for consistent, natural-looking results.
2. NOVO OVO Medium/Long Stiletto Pointed Nail Dual Forms for Polygel Extension, Reusable Full Cover Acrylic/Builder/Hard Gel Poly Gel Molds of Manicure Art for Salon DIY x 14 sizes 280 Pcs

Overview: NOVO OVO’s Medium/Long Stiletto Nail Dual Forms claim to be the world’s first long sharp stiletto dual forms, catering to the growing demand for dramatic, pointed nail extensions. These forms promise to transform time-intensive sculpting into a streamlined process.
What Makes It Stand Out: The innovative sharp stiletto shape delivers dramatic 39mm length without hours of filing. With 14 finger sizes plus 5 dedicated thumb sizes, the set accommodates broad nails and even men’s hands. The separated cuticle design for different nail shapes ensures better fit. Made from premium PMMA, these forms balance pliability with durability.
Value for Money: Priced at $12.99, these specialized forms cost more than standard sets but justify the premium through time savings and niche design. The reusable PMMA construction provides long-term economy for salons focused on trendy stiletto styles.
Strengths and Weaknesses: Strengths include the unique long stiletto shape, extensive sizing options, time-saving application, and durable PMMA material. The brand’s broader creative universe offers additional shapes. Weaknesses include the premium price point and limited versatility—stiletto style only suits certain aesthetics and may be impractical for everyday wear.
Bottom Line: Ideal for nail artists specializing in dramatic, fashion-forward extensions. The extensive sizing and time-saving design make these forms worth the investment for salons catering to stiletto enthusiasts, though casual users may prefer more versatile shapes.
3. ROSALIND Nude Pink Christmas Poly Nail Gel, 2 oz Extension Rose Pink Neutral Builder Pink Gel Quick Building, Gel Acrylic Poly in Tubes for Nail Extension
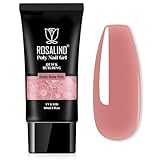
Overview: ROSALIND’s Nude Pink Christmas Poly Nail Gel is a 2-ounce builder gel designed for quick, durable nail extensions. This rose pink polygel offers a neutral tone suitable for various nail art applications, from encapsulated designs to classic French tips.
What Makes It Stand Out: The generous 2-ounce quantity provides substantial product for multiple applications. Its quick-building formula is stronger and more flexible than many competitors, offering lightweight wear that feels natural. With proper prep, extensions last up to a month, and the gel supports bi-weekly refills as cuticles grow.
Value for Money: At $8.99 for 2 ounces, this polygel offers excellent value compared to smaller tubes. The versatility for creating squares, ovals, coffins, and French nails maximizes the return on investment for both home users and professionals.
Strengths and Weaknesses: Strengths include the large quantity, fast application, month-long durability, and compatibility with various nail shapes. The brand’s customer service commitment adds confidence. Weaknesses include the need for separate slip solution or rubbing alcohol to prevent brush sticking, and removal requires filing rather than simple soaking.
Bottom Line: An outstanding choice for those seeking reliable, long-lasting polygel extensions. The generous size, durability, and versatility make it perfect for regular users, though beginners should prepare with proper removal tools and slip solution for best results.
4. Modelones 3D Gel Nail Art, Sculpting Gel Glue for Molding, Drawing, Charms & Gems Glue, Nail Stuff for Chrome Powder and Rhinestone Design No Wipe, U V Light Cured Salon & DIY Use
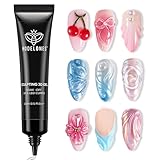
Overview: Modelones 3D Gel Nail Art Sculpting Glue is a multi-functional adhesive designed for creating dimensional nail art. This squeeze-tube gel eliminates the need for brushes or additional tools, streamlining the process for both salon professionals and DIY enthusiasts.
What Makes It Stand Out: The upgraded low-viscosity formula provides defined 3D effects without collapsing, making it beginner-friendly. Its 4-in-1 versatility allows it to sculpt designs, adhere rhinestones and charms, and even rub chrome powder. The no-wipe formula cures under UV light, and the strong adhesive promises 21+ days of wear.
Value for Money: At $6.99, this multi-purpose gel delivers exceptional value. Four separate products would cost significantly more, making it an economical choice for expanding nail art capabilities without multiple purchases.
Strengths and Weaknesses: Strengths include the no-tool squeeze application, beginner-friendly formula, impressive 21-day adhesion, and remarkable versatility. It makes an ideal gift for nail art lovers. Weaknesses include the unspecified quantity (likely small), requirement for UV/LED curing, and potential learning curve for sculpting intricate designs despite the easy-squeeze claim.
Bottom Line: A must-have for nail art enthusiasts seeking versatility and convenience. The strong adhesion and multi-functionality make it perfect for adding dimension and embellishments, though users should ensure they have proper UV/LED equipment and practice for complex sculptures.
5. MGART Dual Nail Forms ALMOND Extension Structure Poly gel Nail Forms Full Cover Molds 12 Sizes for Solid Gel Glue Art Design Salon&DIY

Overview: MGART Dual Nail Forms provide almond-shaped molds specifically designed for structure gel, polygel, hard gel, and acrylic applications. These forms emphasize architectural precision with their flat interior surface that sets the foundation for consistent nail extensions.
What Makes It Stand Out: The absolutely flat interior creates uniform architecture without requiring cutting or excessive filing—simply process the free edge after polymerization. The forms separate cleanly from cured material, reducing cleanup time. With 12 sizes, they accommodate most nail beds while maintaining the elegant almond silhouette.
Value for Money: At $10.99, these mid-priced forms offer solid value through their reusable design and compatibility with multiple systems. The time saved on cutting and filing adds practical worth for busy technicians.
Strengths and Weaknesses: Strengths include the flat interior for precise architecture, clean separation after curing, versatility across gel systems, and the no-cutting design that streamlines workflow. Weaknesses include fewer size options (12 vs competitors’ 14+) and the singular almond shape limits style variety. The product description lacks material specifics beyond “durable materials.”
Bottom Line: An excellent choice for technicians prioritizing structural precision and clean removal. The flat interior design and universal compatibility make these forms reliable for consistent almond extensions, though those needing extensive sizing or shape variety may want to supplement with additional sets.
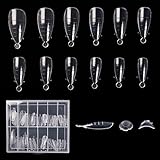
6. Fcozpjk Dual Forms for Polygel, 348PCS Nail Molds for Builder Gel, 12 Sizes Stiletto Ballerina Coffin Dual Forms Poly Gel Tips, Extension Form with 10PCS Nail Clips Extension Tools Kit

Overview: This comprehensive nail extension kit delivers exceptional variety with 348 dual forms across five distinct shapes: stiletto, coffin, ballerina, almond, and duck feet. Each shape includes 60 pieces in 12 sizes, making it suitable for virtually any nail bed. The set includes essential tools like 10 nail clips, a double-headed brush, and a 100/180 grit file, providing everything needed for polygel application in one package.
What Makes It Stand Out: The sheer diversity of shapes sets this kit apart from competitors that typically offer only one or two styles. The inclusion of duck feet shapes is particularly unique for those seeking avant-garde designs. Each form features printed scales for precise length measurement, enabling consistent results. The plastic material allows for repeated use without deformation, and the integrated numbering system helps quickly identify appropriate sizes during application.
Value for Money: At $5.69 for 348 pieces ($0.02 per count), this represents one of the best cost-per-unit values on the market. Comparable kits with fewer forms often cost twice as much. The addition of clips, brush, and file eliminates the need for separate tool purchases, saving beginners approximately $10-15 in additional supplies. The reusability factor further amortizes the already minimal investment.
Strengths and Weaknesses: Strengths include unmatched shape variety, clear sizing guides, and complete tool inclusion. The forms’ flexibility prevents cracking during removal. Weaknesses involve the unspecified plastic quality—while durable, it may not match the rigidity of premium ABS or resin alternatives. The overwhelming quantity might intimidate absolute beginners who don’t need five shapes initially. Some users report the clips lack sufficient tension for thicker polygel applications.
Bottom Line: This kit is ideal for DIY enthusiasts wanting to experiment with multiple nail shapes without financial commitment. Professionals will appreciate the bulk quantity for high-volume services. Despite minor quality compromises, the value proposition is undeniable for those prioritizing variety and affordability.
7. C12rtive 120Pcs Matte Dual Nail Forms,Long Almond Extension Poly Nail Gel Nail Forms Full Cover Nail Molds 12 Sizes for Solid Nail Gel Glue Nail Art Design Salon&DIY

Overview: C12rtive focuses on quality over quantity with 120 matte-finished almond dual forms crafted from premium ABS material. The kit centers on the universally flattering long almond shape, providing 12 numbered sizes to accommodate most nail beds. The matte texture offers a professional aesthetic while preventing slippage during application, and the transparent storage box keeps everything organized.
What Makes It Stand Out: The ABS construction provides superior strength and heat resistance compared to standard plastic forms, ensuring they maintain shape during curing. Each form features clearly marked scales and numbers, allowing nail technicians to quickly identify and track sizes across multiple clients. The matte finish isn’t just cosmetic—it creates slight friction that helps polygel adhere better during sculpting, reducing the risk of shifting.
Value for Money: Priced at $6.99, this kit positions itself in the mid-range segment. While more expensive per-piece than bulk options, the ABS material justifies the premium through enhanced durability and reusability. Professional salons will find the cost reasonable for forms that withstand repeated use without clouding or warping. For home users, the investment pays off through consistent results and longevity.
Strengths and Weaknesses: Strengths include high-grade ABS material, professional matte finish, and excellent organizational system. The focused almond shape ensures mastery of one classic style. Weaknesses are the single-shape limitation—those wanting variety must purchase additional kits. The matte surface, while helpful for grip, can make it slightly harder to see polygel placement against the frosted background. Some users note the forms run slightly narrow for wider nail beds.
Bottom Line: Perfect for professionals and serious DIYers committed to the almond aesthetic. The quality materials and thoughtful design deliver reliable performance that justifies the modest price increase over basic plastic alternatives. Choose this for durability and precision rather than shape experimentation.
8. siyuwuro 120Pcs Dual Nail Forms Poly Extension Gel Nails Full Cover Nail Tip Builder Molds 12 Sizes Clear Almond for Solid Nail Gel Glue Nail Art Design for Home & Salon
Overview: This 120-piece kit features clear almond-shaped dual forms made from resin material, emphasizing both performance and environmental consciousness. The transparent design allows for optimal visibility during polygel application, while the included organizer box separates the 12 sizes for efficient selection. The forms are designed to fit naturally against the nail bed for seamless extensions.
What Makes It Stand Out: The resin composition claims to be environmentally friendly while providing strength surpassing conventional plastics. The crystal-clear transparency is a significant advantage—technicians can easily monitor gel distribution and air bubbles during application. The scale markings are precisely printed and remain visible through multiple uses, unlike some printed forms that fade quickly. The material’s slight flexibility combined with rigidity creates an ideal balance for easy removal.
Value for Money: At $6.79, this kit offers excellent value for resin-based forms. Similar resin products typically retail for $8-12. The clear storage system adds practical value by preventing the size-mixing frustration common with bagged forms. For eco-conscious buyers, the environmental claims provide additional justification. The reusability factor is high—resin resists staining from colored polygels better than porous plastics.
Strengths and Weaknesses: Strengths include superior visibility, resin durability, and eco-friendly positioning. The forms maintain clarity after multiple uses and clean easily with alcohol. Weaknesses involve limited shape options (almond only) and ambiguous environmental certifications. Some users find the resin slightly more brittle than ABS in cold temperatures. The sizing runs average—those with very large or small nail beds may struggle with fit. The price point, while fair, is higher than basic plastic alternatives.
Bottom Line: An excellent choice for environmentally aware users and technicians prioritizing visibility during application. The resin quality and clear design make it worth the small premium over standard plastic forms. Ideal for home salons and professionals specializing in almond extensions.
9. Modelones 6 Colors Poly Nail Gel Set Poly Nail Extension Gel Colors Tubes Kit Glitter Nude Coral Green Light Blue All Seasons Manicure Salon at Home

Overview: Modelones delivers a curated collection of six spring-inspired poly gel colors in convenient 0.5 oz tubes. The set includes nude, coral, green, light blue, and glitter variations designed for all-season manicures. Each tube contains 15g of extension gel that promises 28+ days of wear when properly applied and cured under a UV/LED lamp. The kit targets both beginners and experienced users seeking trendy, pre-matched colors.
What Makes It Stand Out: The color curation is exceptionally on-trend, capturing the popular “soft spring” aesthetic dominating social media. Modelones’ reputation for quality control ensures consistent viscosity across colors, preventing the runny or overly thick textures common in budget poly gels. The tubes feature precise applicator tips for direct placement, reducing waste. The brand includes detailed instructions addressing common beginner mistakes like improper ratios and curing times.
Value for Money: At $13.98 for six colors, each tube costs approximately $2.33—significantly less than purchasing individual shades. Professional-grade poly gels typically run $5-8 per color, making this set economical for building a versatile collection. The quantity per tube is generous, providing enough product for 30-40 full sets. For home users, this eliminates the need to invest in multiple full-size tubes when experimenting with color.
Strengths and Weaknesses: Strengths include beautiful, trendy color selection, reliable brand reputation, and beginner-friendly instructions. The glitter shade adds versatility without requiring separate purchases. Weaknesses are the requirement for a separate UV/LED lamp (not included) and the learning curve for polygel application. Removal requires filing, which may intimidate novices. Some users report the lighter colors need multiple coats for full opacity. The set lacks a clear or builder gel for extensions without color.
Bottom Line: A fantastic starter palette for those committed to learning polygel application. The fashionable colors and brand reliability justify the investment. Ensure you own or purchase a compatible lamp first. Perfect for creating seasonal designs and expanding your nail art color wardrobe economically.
10. Nail Dual Forms Kit For Polygel - 192 PCS Reusable Extension Molds with Silicone Stickers Pads Almond Square False Nails Tips with Nail Clips Brush Files Buffer Nail Builder Extension Kit for Beginner

Overview: This beginner-focused kit prioritizes organization and versatility with 192 dual forms plus 96 silicone molds for French tips. The set includes four nail shapes (square, high heel, coffin, almond) across 12 numbered sizes, all separated into 12 compartments. Additional tools comprise a dual-ended brush, file, buffer, and five clips. The silicone molds enable easy French manicure designs without freehand painting.
What Makes It Stand Out: The compartmentalized storage system is revolutionary for beginners who struggle with size identification—each section is labeled, preventing the frustrating size-sorting common with bulk bags. The inclusion of silicone French tip molds is rare at this price point, allowing users to create crisp white tips by pressing polygel into the molds. The dual-ended brush features both flat and bristle ends, eliminating the need for multiple tools. The forms incorporate clear scales and numbering for systematic learning.
Value for Money: At $4.99, this is the most economical comprehensive kit available. The price per piece is approximately $0.017 when including both form types—unbeatable for a multi-shape set. Comparable kits with silicone molds cost $12-15. For beginners, this represents a complete startup package requiring only polygel and lamp. The reusability factor is decent, though the low price suggests thinner material than premium options.
Strengths and Weaknesses: Strengths include incredible organization, French tip silicone molds, multiple shapes, and near-disposable pricing. The compartment box alone justifies the cost. Weaknesses involve material quality—the forms are thinner than professional-grade alternatives and may warp after 3-4 uses. The included brush sheds bristles occasionally, and the clips lack durability. Some sizes fit inconsistently, particularly the square forms. The “beginner” label means professionals will find the quality lacking.
Bottom Line: The ultimate starter kit for absolute beginners testing the waters of polygel extensions. The organization and bonus silicone molds make learning approachable and fun. Accept the quality trade-off for the price and treat it as a practice set. Upgrade to professional forms once you’ve mastered technique, but this kit removes all barriers to entry for under $5.
Understanding Polygel: The Hybrid Revolution
Polygel represents the perfect marriage between acrylic powder systems and LED/UV hard gels. This innovative formula arrives in tube form with a consistency reminiscent of thick toothpaste or modeling clay, giving technicians unprecedented control during application. The product doesn’t harden until exposed to specific light wavelengths, meaning you can sculpt, shape, and perfect your almond silhouette without racing against a clock.
What Makes Polygel Different from Acrylic and Hard Gel
Unlike traditional acrylic that polymerizes through a chemical reaction between liquid monomer and powder, polygel cures exclusively under LED or UV light, eliminating harsh odors and airborne particles. This light-curing property also means you can work a single nail for several minutes without the product setting prematurely. Compared to hard gel, polygel is significantly less runny and maintains its placed shape without slumping or self-leveling excessively—crucial for maintaining the apex and architecture of almond nails. The tube packaging itself preserves product integrity by minimizing air exposure, preventing that premature thickening that plagues jarred products.
Why Polygel is Ideal for Almond Nail Sculpting
The almond shape’s signature tapered sides and pointed tip require precise product placement and structural integrity. Polygel’s dense consistency allows you to build a pronounced apex—the highest stress point of the nail—exactly where you need it for strength. When using dual forms, the product’s ability to hold its shape means you can press the form against the nail and trust that your sculpted almond will maintain its architecture during curing. The forgiving nature of polygel also allows for corrections; if your initial placement isn’t perfect, you can reposition the form or add more product before committing to the cure.
The Allure of Almond Nails: A Timeless Shape
The almond nail has earned its place as a classic for good reason. This shape creates the illusion of length even on shorter nail beds and provides a sophisticated alternative to stiletto’s extreme point or square’s harsh lines. For polygel applications, almond shapes distribute stress evenly across the enhancement, reducing breakage when executed correctly.
Anatomy of the Perfect Almond Shape
A true almond nail features a sidewall that tapers gradually from the stress area to a soft point, with the tip width measuring approximately 1-2mm at its narrowest. The apex should sit slightly back from the center of the nail, creating a gentle C-curve that follows the natural curvature of the fingertip. When sculpting with polygel and dual forms, you’re essentially creating this shape in reverse—building the structure from the underside and allowing the form to define the perfect taper. The side walls must maintain consistent thickness to prevent weak points that could lead to cracks along the almond’s vulnerable edges.
Why Dual Forms Work Best for Almond Sculpting
Dual forms act as both a mold and a support system during the curing process. Unlike nail tips that require blending and can create bulk at the seam, dual forms produce a seamless enhancement with perfect architecture built in. For almond shapes specifically, the form’s pre-shaped curve ensures both nails in a pair develop identical tapers and tip angles. This symmetry is nearly impossible to achieve freehand, especially when working on all ten fingers. The form also protects the underside of the nail from oxygen inhibition during curing, ensuring a fully hardened surface that won’t remain tacky.
Decoding Dual Forms: Your Sculpting Canvas
Not all dual forms are created equal, and understanding their nuances directly impacts your polygel application success. These transparent silicone or plastic molds come in various shapes, sizes, and flexibilities, each affecting the final result.
How Dual Forms Differ from Traditional Nail Tips
Traditional tips are adhered to the natural nail and require significant filing to blend seamlessly, often compromising the nail’s structural integrity. Dual forms, conversely, are temporary molds that you remove after curing, leaving behind a perfectly shaped enhancement that requires minimal filing. This method eliminates the stress point created by tip adhesives and allows the polygel to bond directly to the natural nail plate. The transparency of quality dual forms lets you monitor product placement and ensure no air bubbles are trapped against the nail bed—critical for preventing lifting.
Selecting the Right Dual Form Size for Almond Nails
The fit of your dual form determines everything from comfort to longevity. For almond shapes, you need a form that extends 2-3mm beyond the natural nail’s free edge but doesn’t impinge on the sidewalls or cuticle area. Too small, and you’ll create a pinching effect that stresses the natural nail; too large, and the enhancement will feel bulky and prone to sidewall lifting. Most professional dual form sets include 12-15 sizes per hand—always size from side to side across the nail’s widest point, not by length. The form should hug the natural nail’s C-curve without leaving gaps where polygel could seep through.
Key Features to Evaluate in Polygel Tubes
When selecting polygel for almond sculpting, tube specifications reveal more than marketing claims. The formulation inside determines whether you’ll achieve that coveted salon-quality finish or battle with product that self-levels too much, remains too rigid, or cures improperly.
Viscosity Levels: Finding Your Perfect Consistency
Polygel viscosity ranges from soft (almost whipped) to firm (clay-like). For almond shapes, medium-firm viscosity offers the best control—it holds the apex without slumping but remains pliable enough to press into dual forms. Softer formulas tend to flatten under the pressure of applying the form, losing that crucial architecture. When examining tubes, look for descriptions like “sculpting consistency” or “medium-firm buildability.” The product should maintain a peak when you pull your tool away, not immediately collapse.
Cure Time and LED/UV Compatibility
Most polygels cure in 30-60 seconds under LED lamps (36 watts or higher) or 2-3 minutes under UV. However, darker pigments may require extended curing times to prevent under-curing, which leads to allergic reactions and product breakdown. Check tube labels for wattage recommendations—using a lamp that’s too weak results in a rubbery cure that files like gum instead of powder. For almond nails, ensure the product cures completely through the thickest point of your apex; incomplete curing here creates a flexible weak spot that will crack under pressure.
Pigmentation and Color Payoff
Highly pigmented polygels require fewer layers to achieve opacity, which is crucial for almond shapes where bulk must be minimized at the tip. Opaque polygels in tubes should provide full coverage in one to two thin applications. Sheer formulas work beautifully for natural-looking enhancements but may need three layers to mask the natural nail line. When evaluating pigmentation, consider whether the color shifts during curing—some pinks deepen significantly, affecting your final shade match.
Odorless vs. Low-Odor Formulations
True odorless polygels contain no volatile organic compounds, making them ideal for home use or sensitive clients. However, some odorless formulas sacrifice workability, becoming tacky or difficult to smooth. Low-odor options maintain better pliability while still eliminating the harsh monomer smell of acrylics. For almond sculpting, a low-odor, medium-firm polygel often provides the best balance—pleasant to work with but still responsive to shaping.
Slip Solution Requirements
Slip solution prevents polygel from sticking to brushes and tools, but formulations vary in how much they require. Excessive slip solution can thin the product and cause it to spread uncontrollably under the dual form. Quality polygels need minimal slip solution—just enough to prevent sticking without altering viscosity. Look for tubes mentioning “low-slip formulation” or “minimal liquid required,” as these products maintain their sculpting properties better during application.
The Almond Sculpting Process: Step-by-Step
Mastering the sequence of application separates amateur results from professional finishes. Each step builds upon the last, creating a foundation that supports the almond shape for three to four weeks of wear.
Preparing the Natural Nail Plate
Begin by removing all surface shine with a 180-grit file, pushing back cuticles completely, and dehydrating the nail plate with an alcohol-based prep solution. Apply a pH-balancing primer specifically formulated for gel products—skip acid-based primers designed for acrylics, as they can cause polygel to lift. For almond shapes, pay special attention to the sidewalls; any cuticle skin left here will create a pocket where lifting begins. Gently etch the lateral folds where the dual form will sit, ensuring maximum adhesion at these stress points.
Applying the Dual Form Correctly
Place a pea-sized amount of polygel in the center of the dual form’s nail bed area, then dip your brush in slip solution and pat the product toward the cuticle end, leaving a 1mm gap. Press the form onto the natural nail at a 45-degree angle, rolling it forward to eliminate air bubbles. The key for almond shapes is ensuring the form’s tip aligns perfectly with the natural nail’s center—misalignment here creates a crooked point. Apply gentle pressure at the apex area to thin the product slightly, preventing excessive bulk that will require heavy filing later.
Sculpting Techniques for Almond Perfection
Once the form is pressed firmly, use your finger to support the underside while you refine the shape. The polygel should extend 2-3mm beyond the natural nail’s free edge, with equal thickness on both sides. For almond shapes, focus on creating a pronounced apex about 1/3 back from the cuticle—this is your pressure distribution point. Use a reverse application technique for clients with flat nail beds: build the apex first, then press the form down, ensuring the C-curve forms naturally without forcing the natural nail into an uncomfortable position.
Curing Protocols for Long-Lasting Wear
Cure each nail for the full recommended time plus an additional 10-15 seconds for the apex area. For almond shapes, cure with the finger laying flat, LED lamp directly overhead—angled curing can cause uneven polymerization. After initial cure, remove the dual form and cure the underside for an additional 30 seconds. This second cure eliminates any sticky inhibition layer that could attract dirt and cause discoloration. Always cap the free edge by running a thin bead of polygel along the tip and curing again; this seals the enhancement and prevents water intrusion that leads to lifting.
Professional Tips for Flawless Application
Even experienced technicians encounter challenges when sculpting almond shapes. These advanced techniques address the nuances that elevate your work from good to exceptional.
Avoiding Common Application Pitfalls
The most frequent mistake is applying too much product at the cuticle, creating a bulky look that lifts prematurely. Use 30% less product than you think you need—polygel spreads significantly when pressed under the dual form. Another pitfall is inadequate slip solution, which causes product to stick to tools and pull away from the nail bed. Keep a small dish of solution nearby and re-dip your brush every 3-4 pats. For almond shapes, watch for product pooling at the tip of the dual form; this creates a thick, heavy point that throws off the shape’s delicate balance.
Achieving Apex Placement in Almond Shapes
The apex should sit slightly toward the cuticle side of center, never directly in the middle. This placement mimics the natural nail’s stress distribution and prevents the tip from feeling levered. When pressing the dual form, apply firmer pressure at the 1/3 mark from the cuticle, thinning the product here slightly. The resulting apex will be subtle but effective, visible as a gentle rise when you view the nail from the side. For longer almond nails (over 20mm extension), consider a double apex technique: a primary apex at the standard position and a secondary, smaller apex near the tip for added rigidity.
Creating Smooth C-Curves with Dual Forms
A proper C-curve prevents flat, unnatural-looking enhancements and provides structural strength. Choose dual forms with a pronounced curve that matches your client’s natural nail arch. Before curing, pinch the sides of the form gently while the polygel is still pliable—this creates a tighter curve. For clients with naturally flat nails, use a slightly smaller form and allow the polygel to bridge the gap, creating a curve without forcing the natural nail into an uncomfortable position. The cured enhancement should have a curve that allows you to see the tip when looking directly at the nail face.
Color Theory for Almond Nail Designs
Color selection dramatically impacts how almond shapes are perceived. The right shade can make fingers appear longer and more slender, while poor choices visually shorten the nail bed.
Choosing Shades That Complement Almond Shapes
Nude shades should match the client’s skin undertone, not just their surface tone. For warm undertones, look for polygels with peach or golden bases; cool undertones need pink or mauve bases. Dark, vampy colors on almond nails create a dramatic, edgy look but can make short nail beds appear even shorter—reserve these for clients with naturally long nail beds. Sheer pinks and milky whites are almond shape classics; they create the illusion of natural, healthy nails while providing the strength of an enhancement.
Sheer vs. Opaque: When to Use Each
Sheer polygels are your secret weapon for creating natural-looking overlays and baby boomer designs. They allow the natural nail to show through, making the enhancement less obvious as it grows out. However, sheers require a perfectly prepped nail plate—any discoloration will show through. Opaque polygels excel at nail art bases and clients who want a polished, manicured look without visible natural nails. For almond shapes, consider using a sheer pink for the first layer to create depth, then an opaque nude for the second layer to perfect the color—this technique creates a multi-dimensional look that mimics natural nail translucency.
Building Color Intensity with Multiple Layers
Never apply one thick layer of colored polygel hoping for opacity. This creates uneven curing and a bulky appearance. Instead, apply two to three thin layers, curing each completely. For almond tips, use a detailing brush to apply the final color layer only to the extension area, feathering it into the natural nail zone. This prevents color from pooling at the cuticle and creates a seamless gradient. When working with glitter polygels, apply a thin layer of clear polygel first, then the glitter layer—this prevents glitter from sitting directly against the natural nail, which can cause lifting and is difficult to file during removal.
Tool Kit Essentials for Polygel Almond Sculpting
Your technique is only as good as your tools. Investing in quality implements designed specifically for polygel work transforms the entire experience from frustrating to fluid.
Brushes and Sculpting Tools
Look for flat, oval-shaped brushes with synthetic bristles and a metal ferrule. Natural hair absorbs slip solution and becomes soggy, while synthetic bristles repel liquid and maintain stiffness. The brush should be small enough for detail work but wide enough to pat product efficiently—size 8 or 10 is ideal for most almond applications. Metal sculpting tools with rounded ends help press polygel into dual form corners without scratching the form’s interior. Keep a separate brush exclusively for colored polygels to prevent cross-contamination of shades.
E-files and Hand Files: Finding Balance
While e-files speed up the process, over-reliance creates flat shapes and thinned apexes. Use a fine-grit ceramic bit (180-grit equivalent) at low speed (10,000 RPM maximum) to refine the shape after form removal, focusing on the tip and sidewalls. Follow with a hand file to perfect the surface and create the final shape. For almond nails, always file from the outside in toward the tip, using long, sweeping strokes that follow the natural taper. Never saw back and forth—this creates micro-tears in the polygel that lead to cracks.
Slip Solutions and Dehydrators
Commercial slip solutions contain polymers that help the product glide without breaking down its structure. Avoid using alcohol or cleanser as slip solution; these evaporate too quickly and can cause the polygel to seize. Apply dehydrator to the natural nail only, never inside the dual form. Some technicians use a thin layer of base gel before polygel application—this can improve adhesion but may alter cure times. Test this technique on yourself before using it on clients, as some base gels create a slippery layer that prevents polygel from bonding properly.
Longevity and Wear: What to Expect
Understanding the realistic lifespan of polygel almond nails manages client expectations and informs maintenance schedules. Several factors influence how long those perfect almond tips will last.
Average Lifespan of Polygel Almond Nails
Properly applied polygel almond enhancements typically last 3-4 weeks before requiring a fill. The tapered tip may show wear sooner, especially on clients who type extensively or use their hands roughly. The apex area maintains its structure longest, while the cuticle and sidewall areas begin to show growth and potential lifting first. Clients with oily nail plates or those who frequently immerse their hands in water may need fills every 2-3 weeks.
Factors That Affect Durability
Application technique accounts for 70% of longevity—thin cuticle placement, proper apex, and sealed edges make the difference. Client aftercare contributes the remaining 30%. Exposure to harsh chemicals without gloves, picking at the enhancement, and using nails as tools dramatically reduce wear time. The natural nail’s health underneath also matters; compromised nails flex more, transferring stress to the polygel and causing cracks. Seasonal changes affect wear too—polygel becomes slightly more brittle in cold, dry weather and more flexible in humidity.
Maintenance Between Fills
Teach clients to apply cuticle oil daily, focusing on the sidewalls and cuticle area. This maintains flexibility and prevents the natural nail from drying out and separating from the enhancement. Recommend a weekly brush of isopropyl alcohol along the cuticle edge to remove lotion buildup that can cause lifting. For almond shapes specifically, advise clients to file any rough edges immediately with a fine-grit buffer to prevent cracks from traveling up the nail. A quick top coat refresh at the two-week mark can extend wear by sealing any microscopic gaps that develop.
Troubleshooting Common Issues
Even perfect applications can develop problems. Knowing how to identify and address issues early prevents complete redo situations and maintains client satisfaction.
Lifting and Separation Prevention
Lifting almost always begins at the cuticle or sidewalls. If you notice separation during the first week, it’s likely due to inadequate prep or product touching the skin. Gently file the lifted area, re-prep the exposed natural nail, and apply a thin layer of polygel, curing thoroughly. For sidewall lifting, check that your dual form wasn’t too wide, causing product to seep under the lateral folds. Prevention is key: use a dehydrator after primer application and avoid flooding the cuticle area. Never fill over lifted product—this traps moisture and bacteria, leading to green nail syndrome.
Avoiding Heat Spikes During Curing
Heat spikes occur when polygel cures too quickly, causing an exothermic reaction that burns the nail bed. This is especially problematic with thick almond apexes. Prevent spikes by using a lamp with a low-heat mode or pulsing the cure: cure for 10 seconds, remove the hand for 5 seconds, then complete the full cure. Dark colors and glitter polygels are more prone to heat spikes due to their pigment density. Apply these in thinner layers or use a builder gel base underneath to absorb some of the heat. If a client experiences burning, immediately remove their hand from the lamp and allow it to cool before continuing.
Fixing Asymmetry in Almond Shapes
Asymmetry usually stems from inconsistent dual form placement or uneven product distribution. If you notice one side is thicker after curing, use a coarse file to reduce the bulk on the heavy side, then refine with finer grits. For minor tip misalignment, file the tip at a slight diagonal to correct the angle, then re-point. When the entire nail is crooked, it’s often easier to remove and reapply rather than filing excessively. To prevent this, always step back and view the nail from the client’s perspective before curing, checking that the tip points directly toward the center of the cuticle.
Removal and Refill Best Practices
Proper removal preserves natural nail health and makes subsequent applications more successful. Rushing this process damages nails and compromises future wear.
Safe Removal Without Natural Nail Damage
Never pry or pop off polygel enhancements. Instead, use an e-file with a coarse carbide bit to thin the enhancement, leaving a thin veil of product on the natural nail. Soak cotton pads in pure acetone, place them on the nails, and wrap with foil. After 15-20 minutes, the remaining polygel will flake off easily with a metal pusher. For almond shapes, be especially careful filing near the tip—over-filing here can thin the natural nail free edge, making it prone to splitting. Always leave a protective layer of polygel if the natural nail underneath is damaged; this acts as a shield while the nail grows out.
When to Refill vs. Remove Completely
Refills are appropriate when the enhancement is structurally sound with less than 3mm of outgrowth and no lifting. Remove completely if you notice widespread lifting, discoloration, or if the client has waited more than 5 weeks between appointments. For almond shapes, consider removal if the tip has become significantly uneven or if cracks have developed in the extension area—these compromise the shape’s integrity and can’t be properly repaired with a fill. Clients who frequently change colors or designs benefit from complete removal every 2-3 fills to reset the nail and remove staining.
Preparing for Refill Applications
During a refill, first remove the top coat and thin the entire enhancement with a medium-grit file, focusing on the cuticle area to create a seamless transition. Apply dehydrator only to the exposed natural nail, not the existing polygel. When applying new product, feather it over the old enhancement by 2-3mm to create a smooth gradient. For almond shapes, rebuild the apex with each fill, as this area compresses slightly over time. Always cap the free edge during fills, even if it appears intact—this seals any microscopic gaps that developed during wear.
Cost Considerations and Value Assessment
Polygel tubes range from budget-friendly to luxury prices, but cost doesn’t always correlate with quality. Understanding what drives price helps you make informed decisions for your kit.
Price vs. Quality: Finding the Sweet Spot
Mid-range polygels ($15-$25 per tube) often provide the best value for almond sculpting. These formulas typically offer professional-grade viscosity and pigmentation without the brand markup of luxury lines. Budget options under $12 frequently contain fillers that reduce workability and cause yellowing. Premium tubes above $30 may offer unique colors or proprietary technologies but rarely justify the cost for everyday sculpting. Look for brands that offer professional sizes (30ml or larger) rather than consumer sizes (15ml)—the per-milliliter cost is significantly lower.
Tube Size and Product Yield
A 30ml tube of polygel yields approximately 15-20 full sets of almond nails, depending on length and thickness. Sheer colors stretch further than opaque or glitter formulas, which require more product for coverage. When calculating cost per service, factor in that you’ll waste approximately 10% of product through brush cleaning and inevitable drying on your work surface. Tubes with narrow nozzle tips reduce waste by allowing precise dispensing, while wide-mouth tubes make it difficult to control portions. Consider purchasing clear polygel in larger tubes (50ml+) since it’s used for every application, whether as a base or for mixing custom colors.
Storage and Shelf Life
Unopened polygel tubes last 24-36 months when stored in a cool, dark place. Once opened, use within 12 months for optimal performance. Exposure to light and air causes the photoinitiators to degrade, resulting in incomplete curing and tacky surfaces. Store tubes upright with caps tightly sealed. If the product becomes thick or stringy, it’s reached the end of its usable life—adding slip solution won’t restore it and will compromise the cure. For almond sculpting, fresh polygel is essential; old product won’t hold the apex and will slump under the dual form, creating flat, weak nails.
Professional vs. At-Home Application
The rise of at-home nail kits has democratized professional-looking enhancements, but almond sculpting with dual forms presents unique challenges for non-professionals.
Skill Level Requirements
Almond shapes require intermediate to advanced skill due to their asymmetrical nature and stress points. Beginners should master basic overlays and short extensions before attempting almond sculpting. The learning curve involves understanding how polygel moves under pressure, how dual forms interact with different nail plates, and how to visualize the final shape in reverse. Most nail enthusiasts need 5-10 practice applications before achieving consistent, wearable almond shapes. Starting on a nail trainer hand or willing friends before working on paying clients builds confidence and technique.
Time Investment Comparison
A professional technician can complete a full set of polygel almond nails in 60-90 minutes, including prep and finish work. At-home applications typically take 2-3 hours initially, decreasing to 90 minutes with practice. The time difference stems from familiarity with product handling and tool efficiency. Dual form application alone can take beginners 15 minutes per nail as they struggle with placement and bubble removal. The filing and shaping phase also extends significantly for non-professionals who haven’t developed the muscle memory for quick, effective contouring.
When to DIY and When to See a Tech
DIY polygel almond nails work well for personal use, practice, and simple designs. However, see a professional for special occasions, corrective work, or if you experience repeated lifting and breakage. Clients with damaged natural nails, severe nail biters, or those requiring extreme lengths benefit from professional assessment and application. The investment in professional services pays dividends in longevity and nail health. For at-home enthusiasts, consider professional maintenance every third fill—this allows a tech to check for underlying issues and reset the nail’s structure.
Frequently Asked Questions
Can I use any polygel tube with dual forms for almond nails?
While most polygels work with dual forms, almond shapes specifically benefit from medium-firm viscosity formulas that hold their architecture. Very soft polygels may slump and create flat shapes, while extremely firm formulas can be difficult to press into form corners. Look for tubes labeled “sculpting grade” or “dual form compatible.”
How do I prevent air bubbles when using dual forms?
Apply product to the center of the form first, then pat it toward the edges rather than spreading it. Press the form onto the nail slowly at a 45-degree angle, allowing air to escape from the cuticle end. If bubbles appear, gently lift the form’s tip and press again. Using slightly less product also reduces bubble formation.
What’s the ideal almond nail length for beginners to sculpt?
Start with extensions no longer than 5mm beyond the natural nail’s free edge. This short almond shape provides practice with the taper and tip without the structural challenges of long extensions. As you master apex placement and form application, gradually increase length in 2mm increments.
Why does my polygel feel sticky after curing?
Sticky residue is normal on the surface exposed to air during curing (the underside after form removal). Wipe it with alcohol or apply a gel top coat. If the entire nail feels sticky or tacky, your lamp wattage is insufficient or the product is under-cured. Try curing for an additional 30-60 seconds.
How do I choose the right dual form size for almond shapes?
Size by width across the nail’s widest point, not length. The form should fit snugly against the sidewalls without pinching. For almond shapes, ensure the form’s tip is centered with the natural nail’s axis—off-center placement creates crooked tips. When in doubt, choose the smaller size; you can always add more product, but a too-large form creates bulky, uncomfortable nails.
Can I mix different polygel brands in one application?
It’s not recommended. Different brands use varying photoinitiator systems and viscosities that may not cure properly when layered. Mixing can cause peeling between layers, incomplete curing, or color shifting. Stick to one brand per application for consistent results and optimal adhesion.
How often should I replace my polygel tubes?
Opened tubes should be replaced every 10-12 months, even if product remains. Unopened tubes last up to three years. Signs it’s time to replace include thickening, stringiness, or requiring longer cure times. For professional use, rotate stock and mark opening dates on tubes to track freshness.
Why do my almond tips keep breaking?
Tip breakage indicates either insufficient apex placement or too-thin product at the stress point. The apex should be slightly back from center, creating a thicker arch that distributes pressure. Also check that you’re using a form with adequate C-curve—a flat form creates flat, weak enhancements. Finally, ensure you’re curing completely; under-cured tips remain flexible and tear easily.
Is LED or UV light better for curing polygel almond nails?
Modern LED lamps (36+ watts) cure polygel faster and more efficiently than UV lamps, reducing heat spikes and saving time. Ensure your polygel is LED-compatible—most current formulas are. UV lamps work but require 2-3 minute cures per nail, increasing service time and heat exposure. For home use, invest in a quality LED lamp with a low-heat setting.
Can I fill polygel almond nails if I’ve used regular polish on top?
Yes, but the polish must be completely removed first. Any remaining polish prevents proper adhesion of the new polygel layer. Use acetone to remove color, then lightly buff the enhancement surface to remove shine before applying dehydrator and primer. Fills are most successful when done before lifting or significant outgrowth occurs, typically at 3 weeks.